renderer.plugins.interaction.autoPreventDefault = false;
renderer.view.style.touchAction = 'auto';
pixi canvas 在手機上,無法感應scroll。加上上列兩行就可以了。
renderer.plugins.interaction.autoPreventDefault = false;
renderer.view.style.touchAction = 'auto';pixi canvas 在手機上,無法感應scroll。加上上列兩行就可以了。


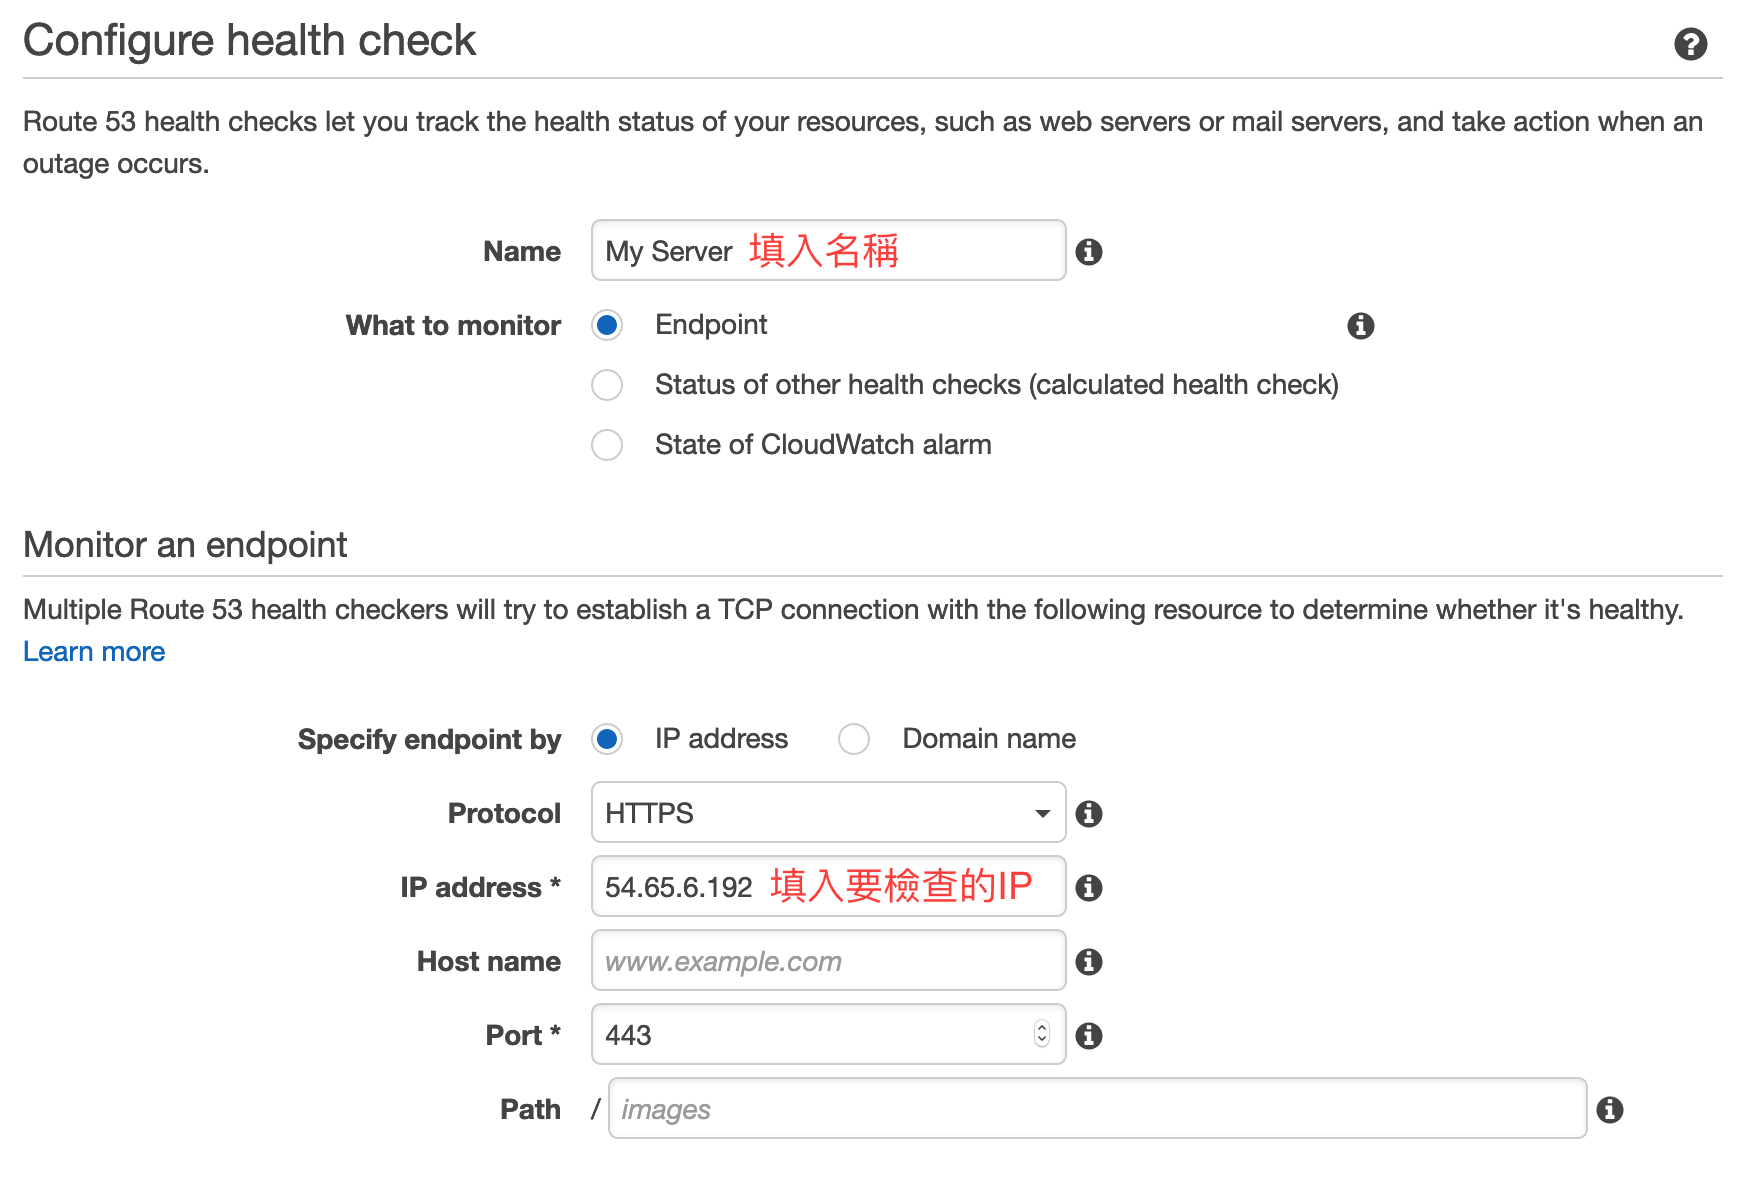
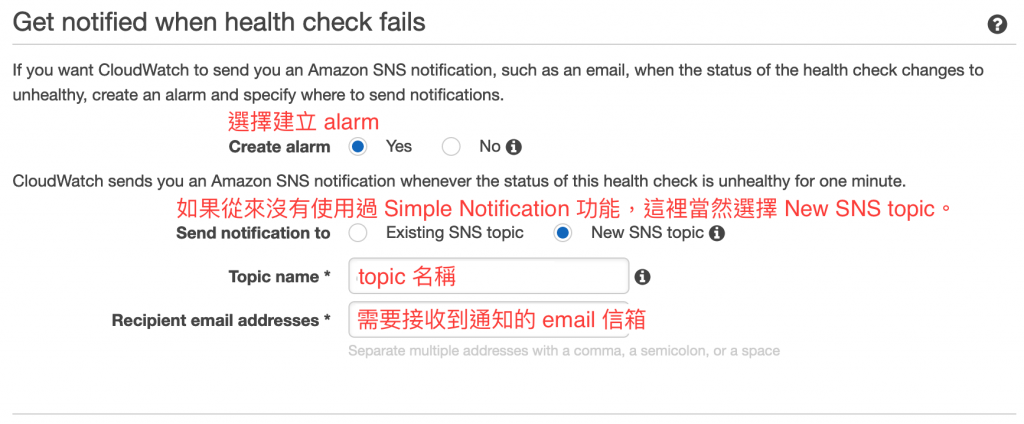
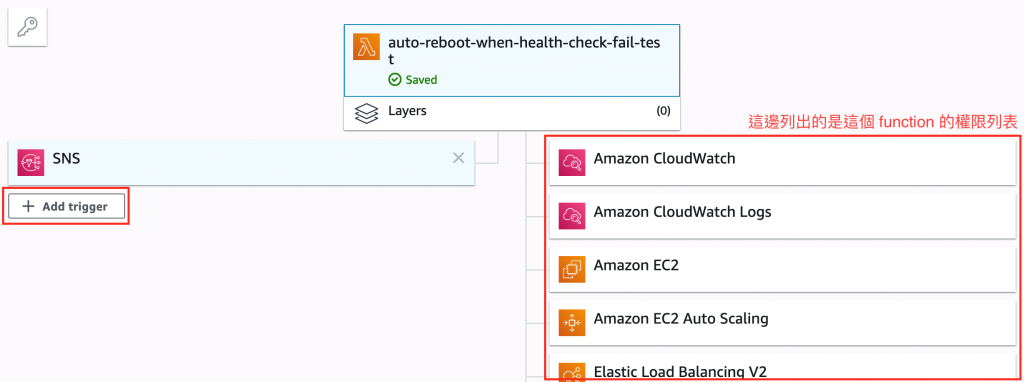
開啟 Lambda console,選擇 create function 輸入 function 名稱(例:auto-reboot-when-health-check-fail),runtime 選擇 Python 2.7,Execution role 的部份因為要使用 Lambda 在 health check 通知不正常時重新啟動 ec2 instance 所以需要有 AmazonEC2FullAccess ,如果你想要觀察 Lambda function print 出的訊息另外需要 CloudWatchLogsFullAccess


使用 Add trigger 加入觸發條件
變數 region 為服務區域的代號,這裡可以查詢。
import boto3

region = 'ap-northeast-1'
ec2 = boto3.resource('ec2')

def lambda_handler(event, context):
    # 將 SNS 裡設定的 tags 取出,用來辨別需要重啟哪個 instance
    tag = event['Records'][0]['Sns']['Tags'][0]
    #print("Tag Key: " + tag['Key'] + " / Value: " + tag['Value'])

    filters = [{
        'Name': 'tag:Name',
        'Values': [tag['Value']]
    }]

    instances = ec2.instances.filter(Filters=filters)
    RunningInstances = [instance.id for instance in instances]

    if len(RunningInstances) > 0:
        # 找到對應 tag 的 instance
        #print("instance.id : " + RunningInstances[0])
        ec2Client = boto3.client('ec2', region_name=region)
        ec2Client.reboot_instances(InstanceIds=[RunningInstances[0]])
        print('reboot your instances: ' + RunningInstances[0])
    else:
        print("none found")
{
  "Records": [
    {
      "EventSource": "aws:sns",
      "EventVersion": "1.0",
      "EventSubscriptionArn": "你的 SNS ARN",
      "Sns": {
        "Type": "Notification",
        "MessageId": "95df01b4-ee98-5cb9-9903-4c221d41eb5e",
        "TopicArn": "arn:aws:sns:ap-northeast-1:123456789012:ExampleTopic",
        "Subject": "My Server Health Low",
        "Message": "My Server Health Low",
        "Tags": [
          {
            "Key": "Name",
            "Value": "你在 SNS topic 裡設定的 EC2 Instance Name"
          }
        ]
      }
    }
  ]
}
設定好之後關閉設定視窗就可以按下 Test 來測試看看了,按照設定的話接收到測試的 SNS 之後該對應的 EC2 Instance 就會重啟了。
以上就是我設定使用 Health check 來偵測,然後通知 Lambda 重啟 EC2 Instance 的方式,歡迎討論。
var queue = new createjs.LoadQueue();
// 確保 Script 載入順序為優先,預設為 true。所以可以不必特別設定。
queue.maintainScriptOrder = true;
queue.loadManifest([
    "script1.js",
    "script2.js",
    "image1.png",
    // 使用 maintainOrder 保持其他物件的載入順序
    {src: "image2.png", maintainOrder: true},
    "image3.png",
    // 將會等待 image2.png 先行載入(在 XHR 支援的情況下會等待 image2.png 載入完畢)
    "script3.js"
]);queue.setMaxConnections(3);
<a href="tel:0800-080-090">0800-080-090</a>
<a href="tel:0800-080-090">服務電話</a>
跟其他的 <a> 一樣,你可以使用CSS
a {
  color: green;
  text-decoration: none;
}
來自定所有 <a> 的樣式,或是使用 pseudoe 選擇來只樣式化 tel: 的內容
a[href^="tel:"]{
  color: green;
  text-decoration: none;
}
| 瀏覽器 | 是否可以連結? | 連結動作 |
|---|---|---|
| Safari | Yes | 詢問撥打電話 |
| Chrome (OSX) | Yes | 啟動程式詢問視窗跳出 |
| Firefox (OSX) | Yes | 啟動程式詢問視窗跳出 |
| Safari (iOS) | Yes | 詢問撥打電話 |
| Line 內置瀏覽器 (iOS) | Yes | 詢問撥打電話或傳送簡訊 |
| Chrome (iOS) | Yes | 詢問撥打電話 |
<meta name = "format-detection" content = "telephone=no">

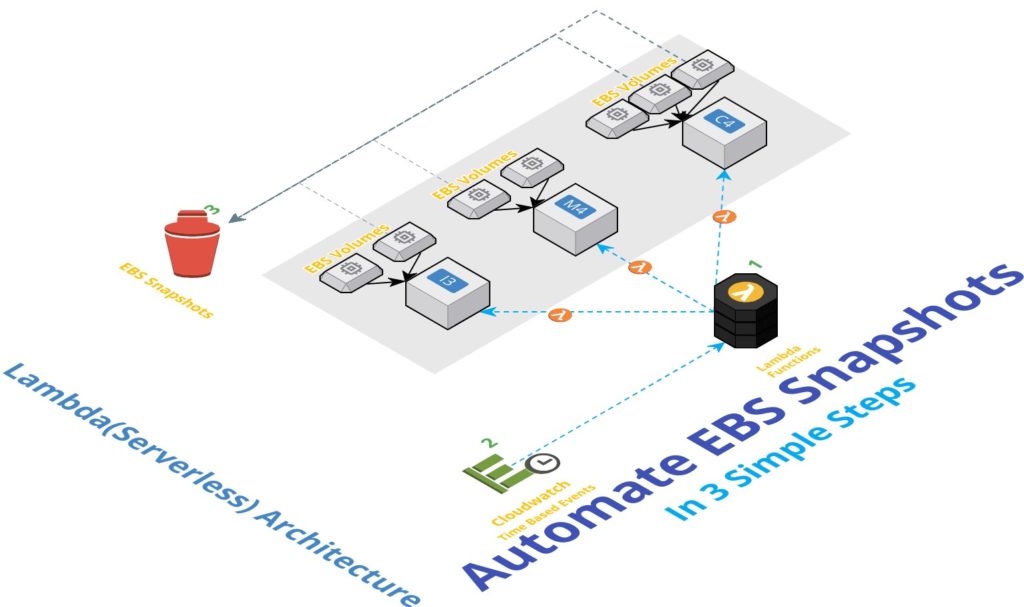
備份 EBS 應該是很常見的事務性工作,所以我在網上找到了資料來使用 Lambda 機器人,為我的 EBS 自動建立備份快照(snapshot)。
只要按照這三個步驟就可以建立一個 EBS 自動備份機器人
此 Lambda function 的主要用途有
建立 Lambda backup ,環境選擇 python 2.7。
在 # 全域變數 區塊設定為與自己相應的設定。
import boto3
import collections
import datetime

#全域變數
globalVars  = {}
globalVars['Owner']                 = "Your-Name"
globalVars['Environment']           = "Production"
globalVars['REGION_NAME']           = "ap-northeast-1"
globalVars['tagName']               = "Serverless-Automated-Backup"
globalVars['findNeedle']            = "BackUp"
globalVars['RetentionTag']          = "DeleteOn"
globalVars['RetentionInDays']       = "30"

# Region 名稱
ec = boto3.client('ec2', region_name='ap-northeast-1')

def backup_bot():

    snapsCreated = { 'Snapshots':[], }

    filters = [
        {'Name': 'tag-key', 'Values': [ globalVars['findNeedle'] ]},
        {'Name': 'tag-value', 'Values': ['Yes']},
    ]

    reservations = ec.describe_instances( Filters=filters ).get( 'Reservations', [] )

    instances = sum(
        [
            [i for i in r['Instances']]
            for r in reservations
        ], [])

    # 列出 Instances 的數量 : %d" % len(instances)
    snapsCreated['InstanceCount']=len(instances)

    to_tag = collections.defaultdict(list)

    # 遍歷該 Region 所有的 Instances
    for instance in instances:
        try:
            retention_days = [
                int(t.get('Value')) for t in instance['Tags']
                if t['Key'] == 'Retention'][0]
        except IndexError:
            retention_days = int(globalVars['RetentionInDays'])

        # 取得所有的 EBS
        for dev in instance['BlockDeviceMappings']:
            if dev.get('Ebs', None) is None:
                continue
            vol_id = dev['Ebs']['VolumeId']

            # 遍歷 Tags 來收集 Instances 的 name
            DescriptionTxt = ''
            for tag in instance['Tags']:
                if tag['Key'] == 'Name' :
                    DescriptionTxt = tag['Value']

            snap = ec.create_snapshot( VolumeId=vol_id, Description=DescriptionTxt )

            to_tag[retention_days].append(snap['SnapshotId'])

            # Tag 所有的剛建立的 snapshots 加上 Deletion Date
            # 以 "DeleteOn" 管理所有的 snapshots 何時該被移除
            for retention_days in to_tag.keys():
                delete_date = datetime.date.today() + datetime.timedelta(days=retention_days)
                # format 日期
                delete_fmt = delete_date.strftime('%Y-%m-%d')
                # 建立 Name, DeleteOn Tag 在 EBS sanpshots 上
                ec.create_tags(
                                Resources=to_tag[retention_days],
                                Tags=[
                                        {'Key': globalVars['RetentionTag'], 'Value': delete_fmt},
                                        {'Key': 'Name', 'Value': snap['Description'] },
                                    ]
                            )
                snapsCreated['Snapshots'].append({ 'SnapshotId':snap['SnapshotId'], 'VolumeId' : vol_id, 'InstanceId' : instance['InstanceId'], 'DeleteOn': delete_fmt })

        to_tag.clear()

    return snapsCreated


def lambda_handler(event, context):
    return backup_bot()

if __name__ == '__main__':
lambda_handler(None, None)使用 Cloudwatch Event 呼叫 Lambda 進行備份
# 每 5 分鐘備份一次.
rate(5 minutes)
or
# 每天備份一次.
rate(1 day)
or
# 每天 12:00pm UTC 進行備份.
cron(0 12 * * ? *)
更多 Scheduled 表達式的使用, 請參考: CloudWatch – Schedule Expressions for Rules